Dry-Bulb, Wet-Bulb, and Moisture Measurements
Dry-bulb and wet-bulb temperatures are two basic measurements used to describe moist air. Dry-bulb temperature shows how warm or cool the air is, while wet-bulb temperature responds to the cooling effect of water evaporating into the air.
This lesson explains how the measurements differ, what wet-bulb depression means, where measurements should be taken, and how common testing errors can lead to incorrect conclusions.
What You Will Learn
Define dry-bulb temperature and wet-bulb temperature.
Explain why evaporation lowers the wet-bulb reading.
Calculate wet-bulb depression from measured temperatures.
Relate a larger or smaller wet-bulb depression to the air’s moisture condition.
Select useful locations for return-air, supply-air, indoor-air, and outdoor-air measurements.
Recognize common instrument, wick, airflow, and placement errors.
Dry-Bulb and Wet-Bulb Measure Different Things
Dry-bulb temperature is the air temperature measured by an ordinary temperature sensor. The sensor must be dry and protected from direct sunlight, hot equipment surfaces, and other unwanted heat sources that could change its reading.
Wet-bulb temperature is measured with a temperature sensor covered by a clean, water-wetted wick while air moves across it. Water evaporating from the wick removes heat and lowers the sensor temperature. The stable temperature reached during this process is the wet-bulb reading.
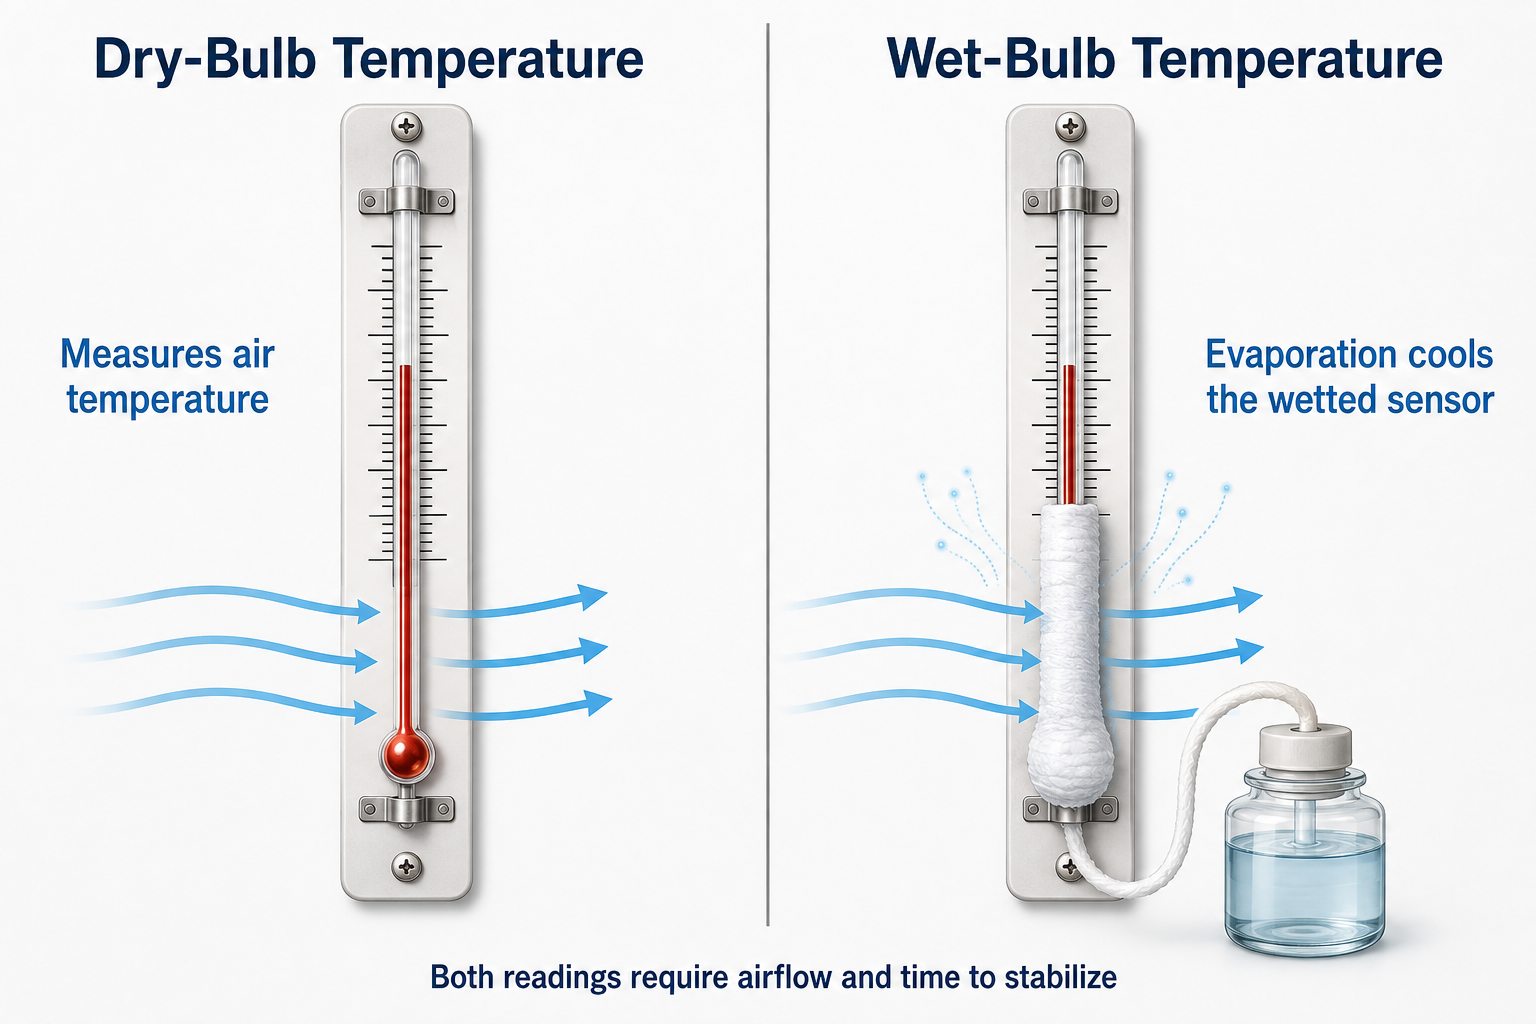
Air Temperature
The sensor is dry. The reading tells how warm or cool the air is and is commonly written as DB or DBT.
Evaporatively Cooled Temperature
The sensor has a wetted wick with air moving across it. The reading is commonly written as WB or WBT.
A useful wet-bulb measurement requires a wetted sensing surface and adequate airflow across that surface. Simply placing a thermometer in water does not measure the air’s wet-bulb temperature.
Evaporation Lowers the Wet-Bulb Temperature
Liquid water needs energy to become water vapor. During a wet-bulb test, some water in the wick evaporates into the passing air. The energy needed for evaporation comes from the wick, the sensor, and the nearby air, so the wet-bulb sensor cools.
If the air can accept more water vapor, evaporation continues and produces a lower wet-bulb reading. If the air is already saturated, no net evaporation can continue under the test conditions and the wet-bulb and dry-bulb temperatures are equal.
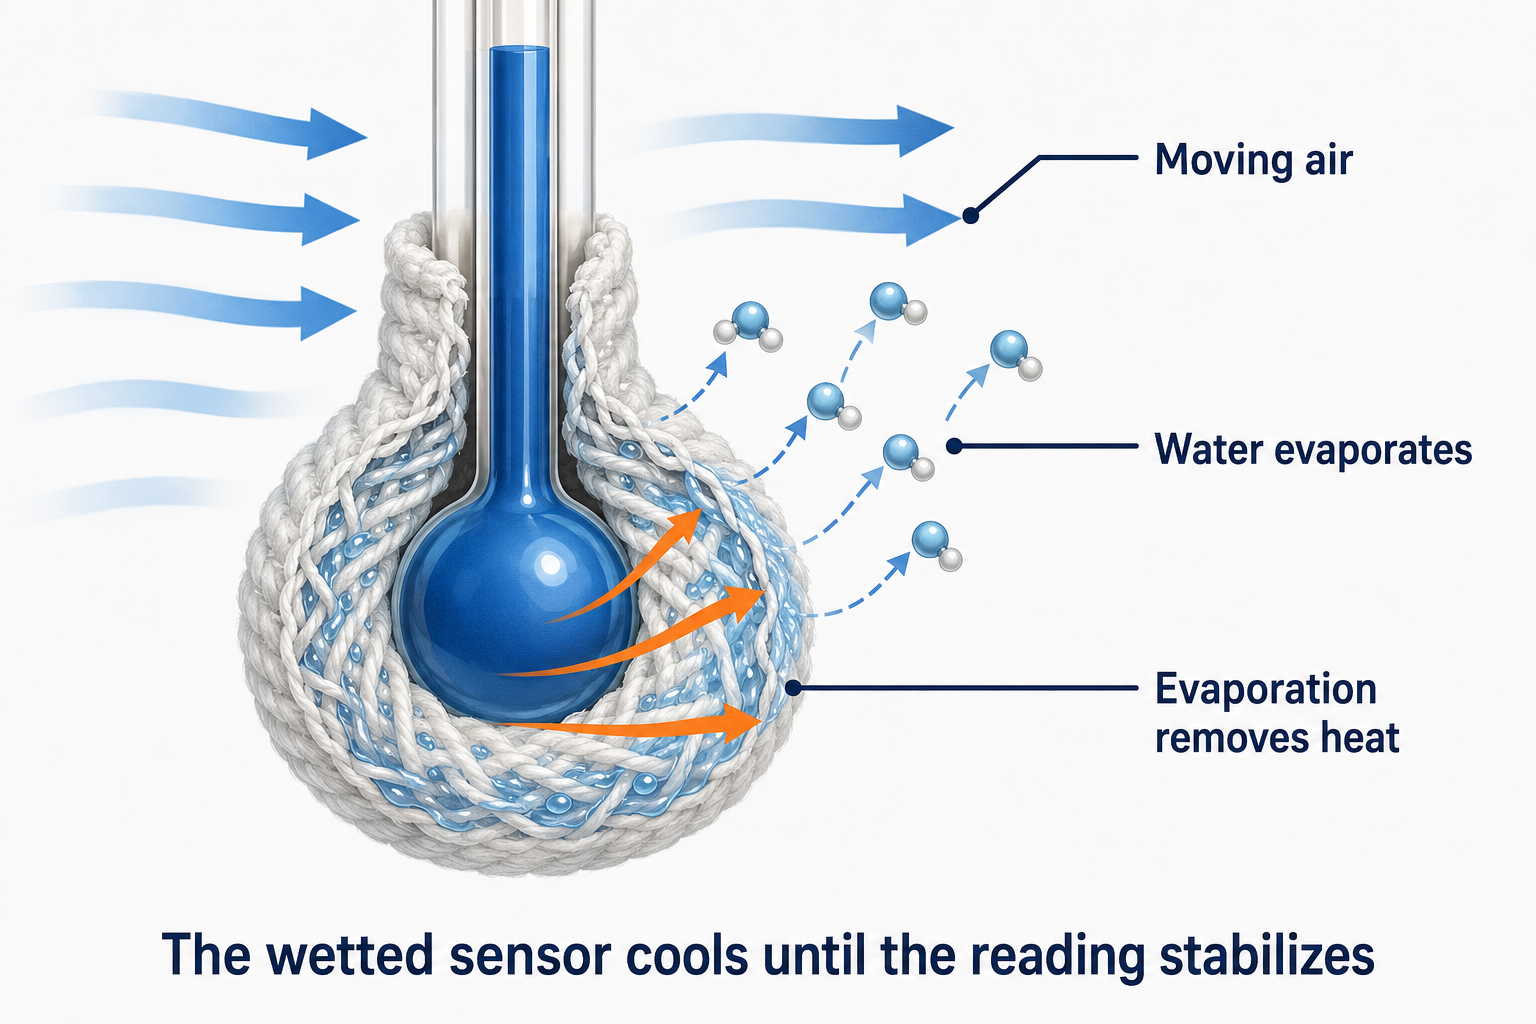
For ordinary unsaturated air measured correctly, wet-bulb temperature is lower than dry-bulb temperature. At saturation, the readings are equal. A wet-bulb reading above dry-bulb usually indicates instrument, setup, stabilization, or recording error.
The Difference Between the Two Readings
Wet-bulb depression is the difference between dry-bulb temperature and wet-bulb temperature. It shows how much evaporative cooling occurred during the measurement.
Wet-bulb depression = dry-bulb temperature − wet-bulb temperature
For example, if the dry-bulb temperature is 80°F and the wet-bulb temperature is 67°F, the wet-bulb depression is 13°F. If both readings are 70°F, the depression is 0°F and the air is saturated at that condition.
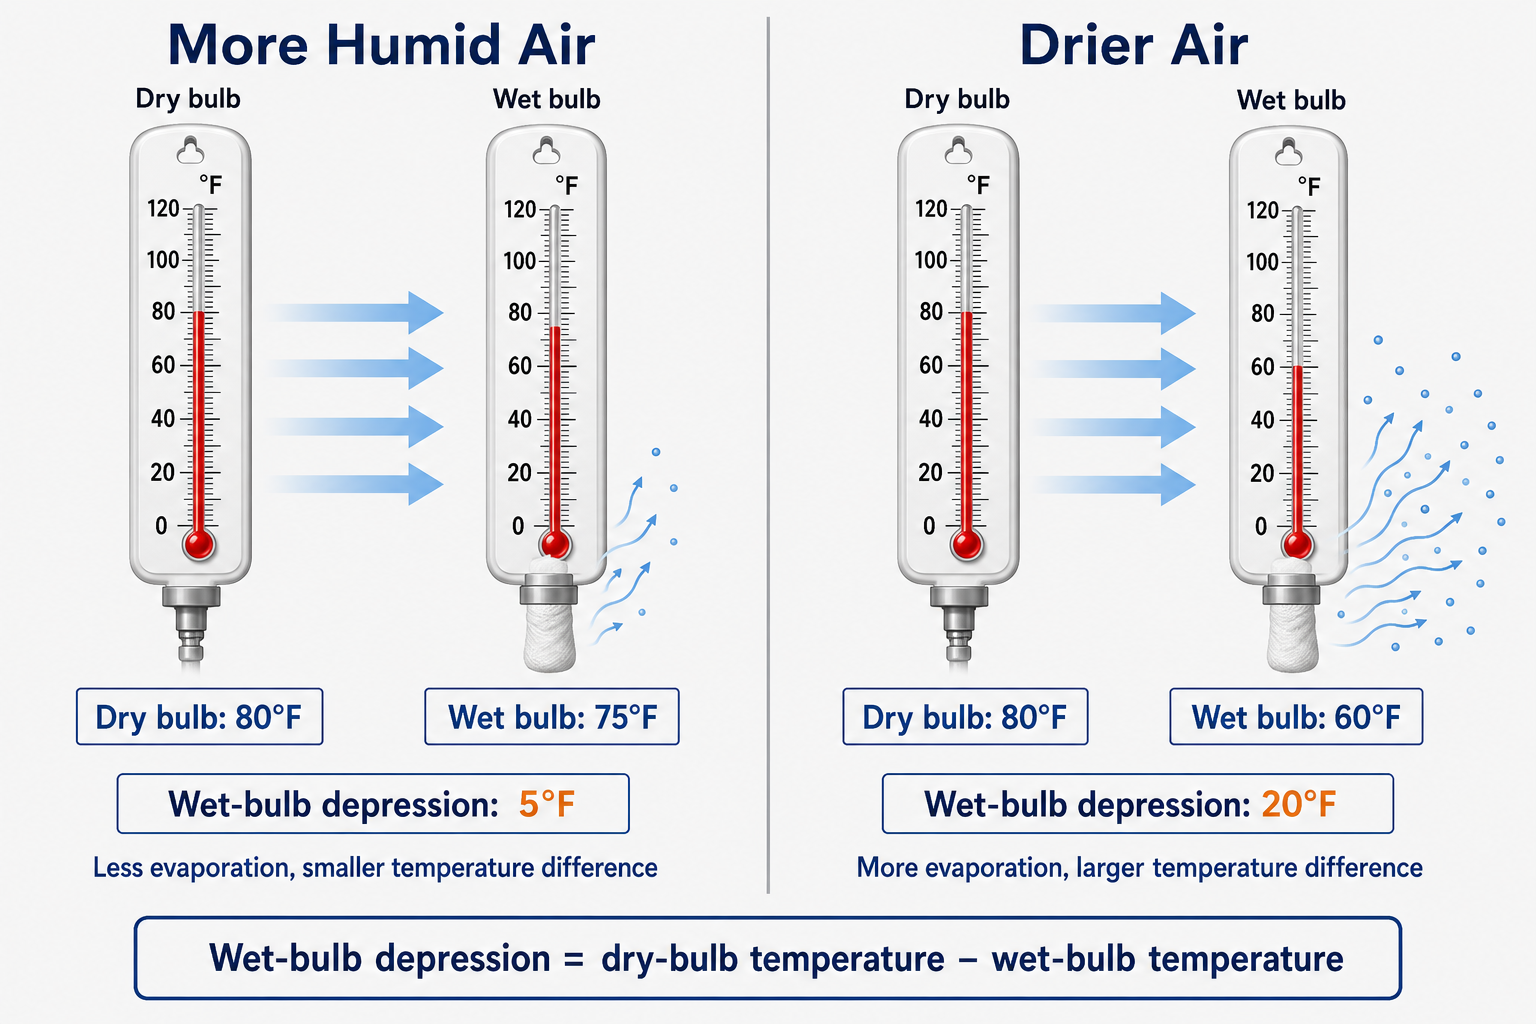
More Evaporative Cooling
At the same dry-bulb temperature and pressure, a larger depression generally indicates drier air and more ability to accept water vapor.
Less Evaporative Cooling
At the same dry-bulb temperature and pressure, a smaller depression generally indicates air closer to saturation.
Keep the comparison controlled: Wet-bulb depression does not by itself state the exact relative humidity. Dry-bulb temperature, wet-bulb temperature, and barometric pressure or the correct psychrometric chart are needed for accurate property determination.
Mechanical and Electronic Measurements
A sling psychrometer uses separate dry-bulb and wet-bulb thermometers. The instrument is moved through the air to create airflow across both sensors. An aspirated psychrometer uses a fan to pull or push air across the sensors.
Many technicians use electronic temperature and relative-humidity instruments. These devices measure temperature and humidity electronically and may calculate wet-bulb temperature, dew point, or other properties. A calculated wet-bulb value is useful only when the instrument is accurate, properly placed, allowed to stabilize, and used within its specified operating range.
Sling Psychrometer
Creates airflow by moving the instrument. It requires a clean, fully wetted wick and enough operating time for the readings to stabilize.
Aspirated Psychrometer
Uses a fan for controlled airflow across the dry- and wet-bulb sensors. Airflow passages must remain clean and unobstructed.
Electronic Psychrometer
Measures temperature and humidity with electronic sensors and calculates additional properties. Sensor condition, calibration, placement, and stabilization remain important.
Measure the Air That Answers the Service Question
Instrument accuracy does not help if the probe is placed in air that does not represent the condition being investigated. Before measuring, decide whether the question concerns room air, outdoor air, return air, mixed air, or supply air.
For equipment performance, entering-air and leaving-air readings should represent the airstream on each side of the equipment. Avoid placing a probe against a coil, heat exchanger, cabinet surface, duct wall, or other surface that can influence the sensor.
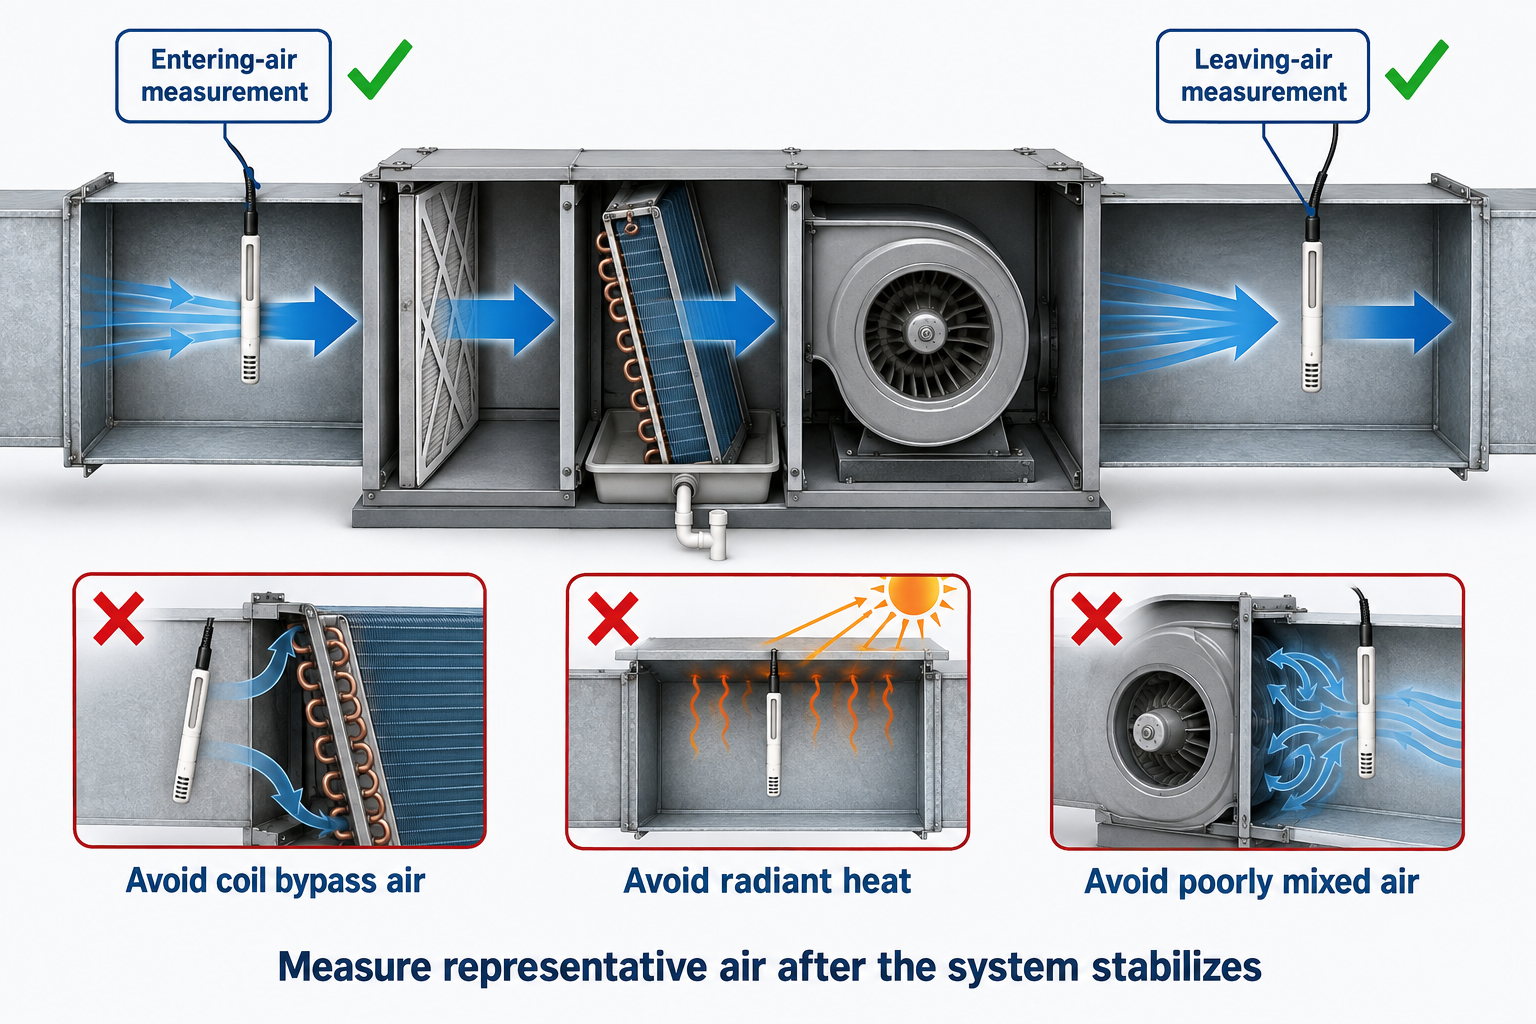
Room Air
Measure in the occupied area away from direct supply discharge, exterior doors, windows, sunlight, appliances, and people breathing directly on the sensor.
Return Air
Choose a location that represents air entering the equipment and is not distorted by an outdoor-air stream or nearby bypass leakage.
Supply Air
Measure far enough downstream for the leaving air to be reasonably mixed, while avoiding duct-wall contact and radiant influence from the equipment.
Outdoor Air
Shield the sensor from direct sun, rain, hot roofs, condenser discharge, exhaust outlets, and building surfaces that do not represent the outdoor air entering the system.
A temperature without a location is incomplete service information. Record whether the value represents room, return, mixed, supply, or outdoor air and note the equipment operating condition.
Control the Conditions That Affect the Reading
1. Inspect the Instrument
Use clean, undamaged sensors and verify that the instrument is suitable for the expected temperature and humidity range.
2. Prepare the Wick
Use a clean wick that fits the sensor correctly. Wet the entire sensing portion with clean water so dry sections do not affect the reading.
3. Provide Airflow
Move enough representative air across the wetted sensor according to the instrument instructions. Do not block the airflow with a hand or nearby surface.
4. Allow Stabilization
Continue the test until the wet-bulb reading stops falling and becomes stable. Recheck if the wick begins to dry before stabilization.
5. Read Both Values
Record dry-bulb and wet-bulb temperatures promptly and keep the correct units with each value.
6. Check Reasonableness
Confirm that wet-bulb is not above dry-bulb and that the readings are reasonable for the location and operating condition.
Small Errors Can Produce Misleading Results
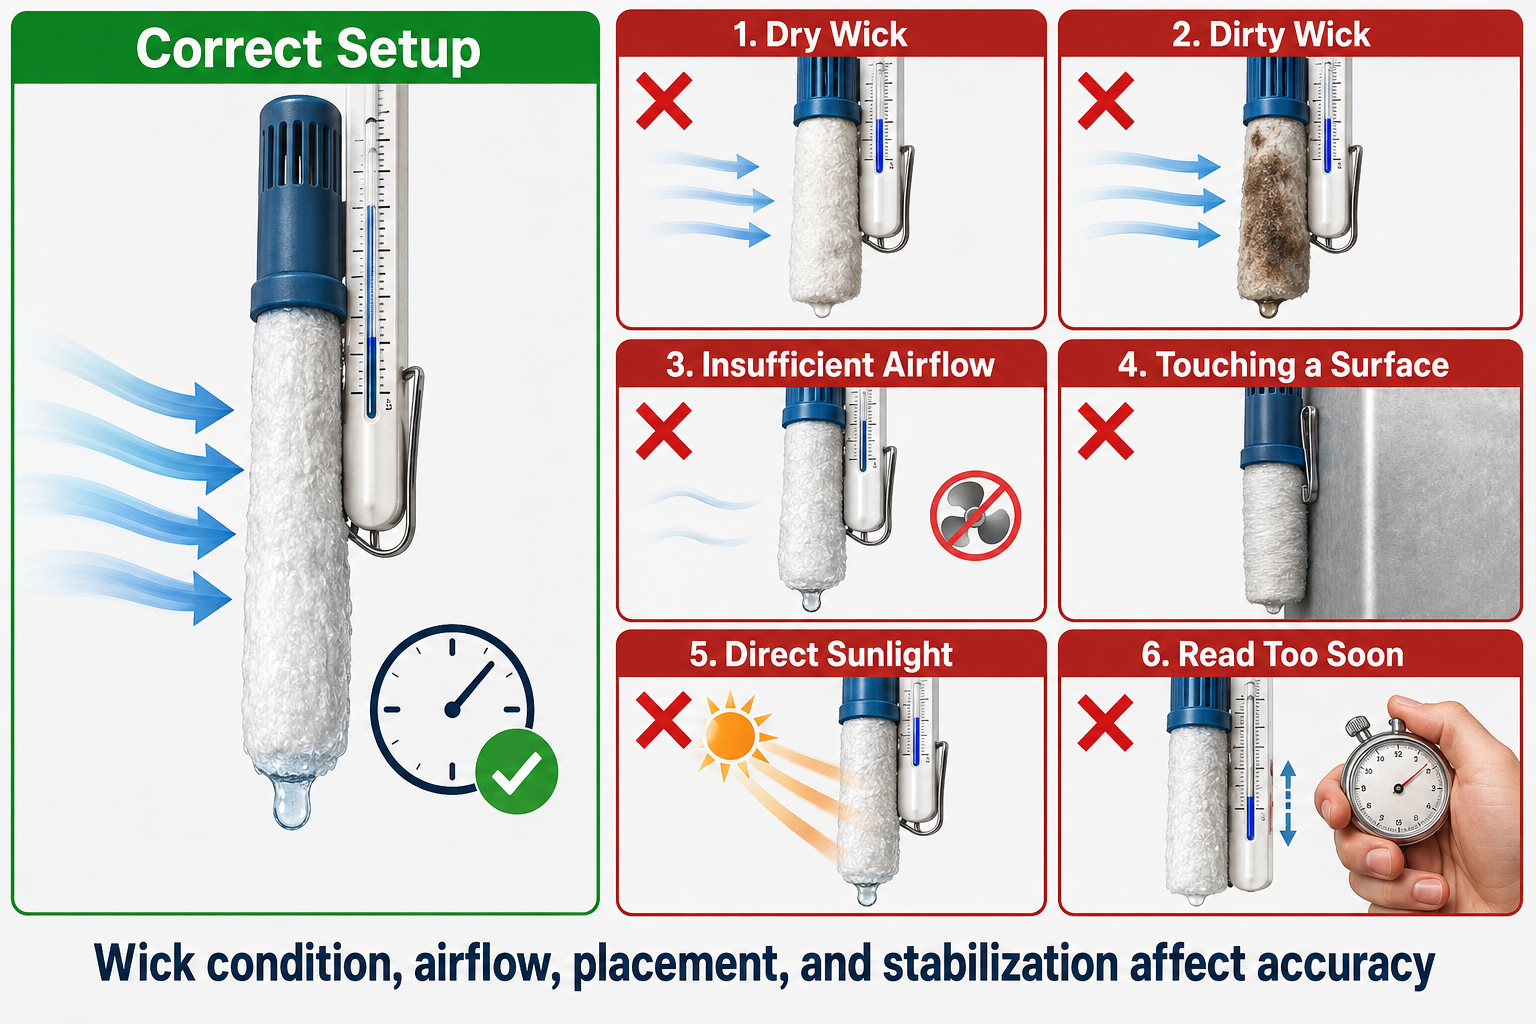
Dirty or Contaminated Wick
Oil, dirt, minerals, or handling residue can interfere with uniform wetting and evaporation. Replace a contaminated or damaged wick.
Wick Not Fully Wet
A partly dry sensing surface cannot produce the intended evaporative cooling and may make the wet-bulb reading too high.
Insufficient Airflow
Slow or blocked airflow allows a layer of cool, moisture-rich air to remain around the wick and can prevent a dependable reading.
Heat from Hands or Surfaces
Holding the sensing area, touching a duct wall, or measuring near a hot or cold surface can influence the temperature.
Reading Too Soon
The wet-bulb temperature normally falls as evaporation begins. Record the value only after the reading reaches a stable minimum.
Changing System Conditions
Measurements taken during startup, cycling, defrost, or rapidly changing airflow may not represent steady equipment operation.
Required airflow, stabilization time, water quality, wick type, sensor maintenance, and calibration procedures vary by instrument. The instrument instructions take priority over a general field procedure.
Avoid These Measurement Mistakes
“Wet-bulb directly tells relative humidity.”
Wet-bulb must be used with dry-bulb temperature and the applicable pressure or psychrometric relationship to determine relative humidity.
“A larger depression always gives one fixed humidity.”
The meaning of a depression depends on the dry-bulb temperature and pressure. The same depression can occur at different relative humidities.
“Any nearby air is good enough.”
A probe near a supply outlet, open door, hot roof, wet coil, or bypass leak may not represent the intended airstream.
“A digital display guarantees accuracy.”
Electronic instruments still require suitable sensors, correct placement, stabilization, maintenance, and periodic accuracy checks.
Can You Explain Dry-Bulb and Wet-Bulb Measurements?
- What does dry-bulb temperature measure?
- What must cover the sensing element during a wet-bulb test?
- Why does the wet-bulb sensor cool?
- What is wet-bulb depression?
- Calculate the depression for 78°F dry-bulb and 65°F wet-bulb.
- What does a larger depression generally indicate when dry-bulb temperature and pressure remain the same?
- When are dry-bulb and wet-bulb temperatures equal?
- Why must airflow move across the wet wick?
- Why should a supply-air probe not rest against a duct wall?
- Name four common causes of an inaccurate wet-bulb measurement.
- Why should entering- and leaving-air measurements be taken under stable operating conditions?
- What should be checked if wet-bulb temperature is higher than dry-bulb temperature?
What You Should Have Learned
Dry-bulb temperature is the air temperature measured by a dry sensor protected from unwanted heat influences.
Wet-bulb temperature is produced by evaporation from a wetted sensing surface with air moving across it.
Wet-bulb depression equals dry-bulb temperature minus wet-bulb temperature.
At the same dry-bulb temperature and pressure, a larger depression generally indicates drier air and a smaller depression indicates air closer to saturation.
At saturation, dry-bulb and wet-bulb temperatures are equal and wet-bulb depression is zero.
Measurements must represent the intended room, outdoor, return, mixed, or supply airstream.
Wick condition, complete wetting, adequate airflow, correct placement, and stabilization are necessary for dependable wet-bulb readings.
Electronic instruments still require proper placement, maintenance, stabilization, and verification of accuracy.